Integrate your Extreme Networks devices with your MyWiFi account and enable guest access capabilities.
Required:
- Active MyWiFi subscription
- Active Aruba Networks subscription
- Active location with an assigned campaign
Extreme Networks - access point identification
- Log in to the Extreme Networks Cloud.
- Under your dashboard, find and save the Device MAC address for each access point you are going to add to MyWiFi.

MyWiFi Setup
- Log in to your dashboard.
- Select Devices.
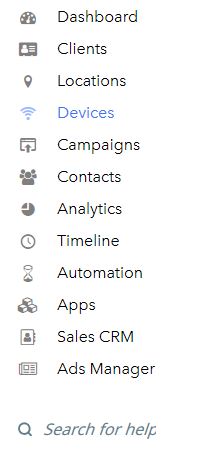
- Click Add New Device.

- Select the Location, enter a Device Name, and choose Ubiquiti.

- Enter the MAC address(es) that you retrieved from Extreme Networks above. If you're entering more than one, you can list them all at once, separated by commas.
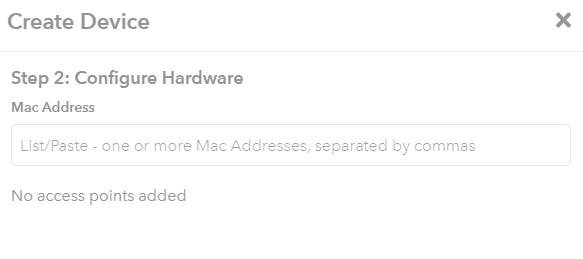
- Click Complete Setup after confirming the device information.
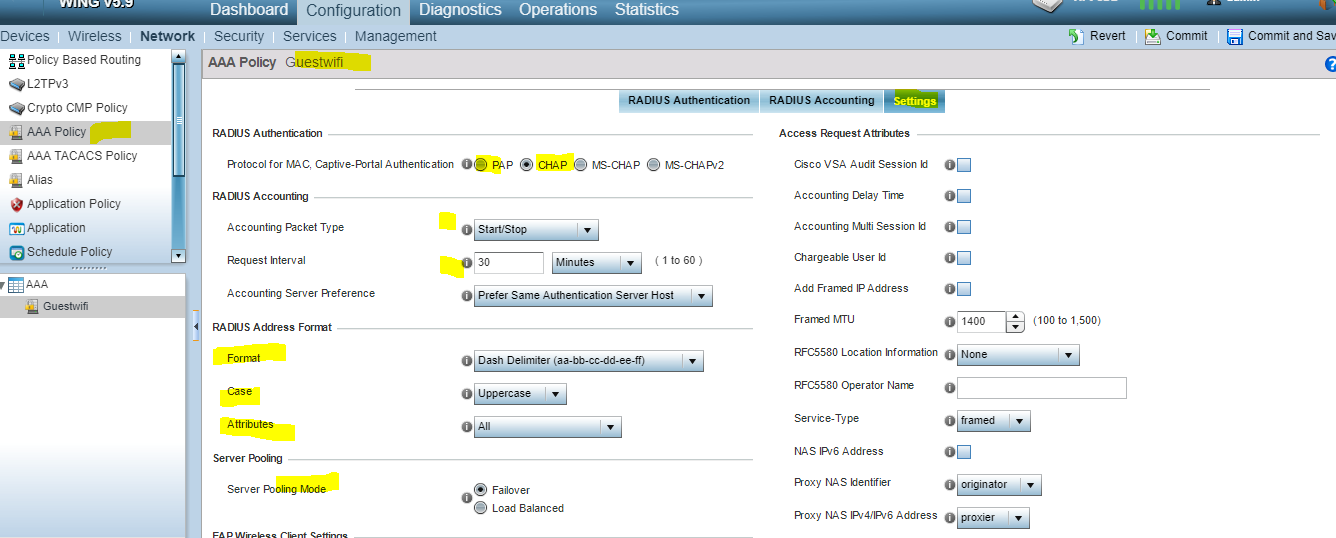
Extreme Networks - configure RADIUS authentication
- Name: MyWiFi
- Type: select AAA Policy Edit
- Auth Method: select PAP
- Backup RADIUS: check Enable Backup RADIUS support
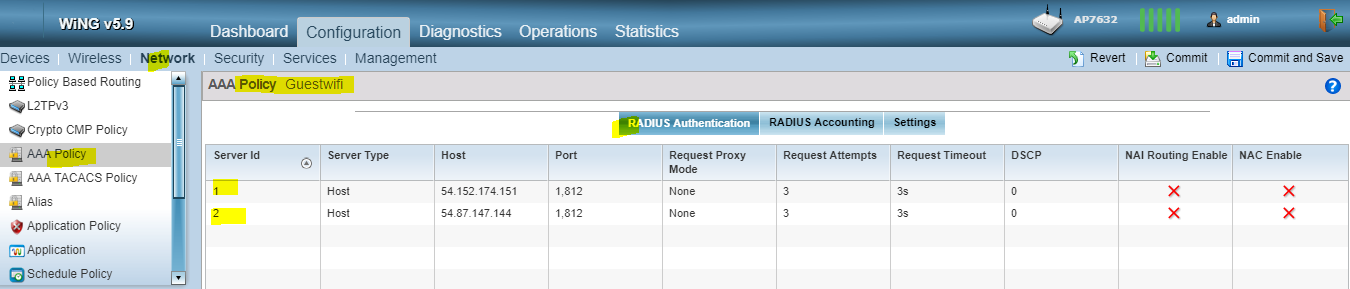
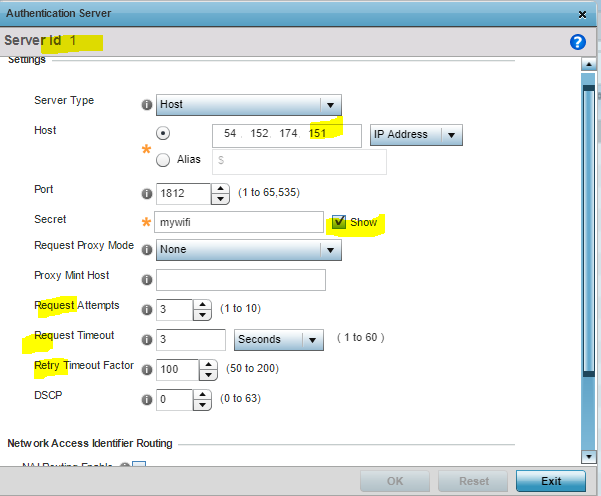
Configure a Primary RADIUS Server with the following parameters:
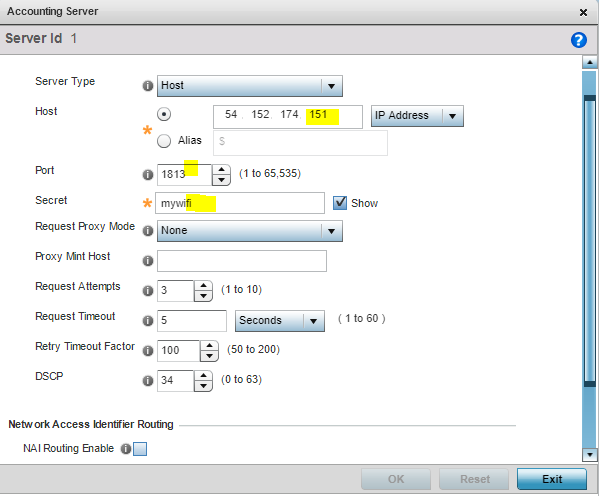
- IP Address: 35.174.133.59
- Secret: mywifi
- Port: 1812
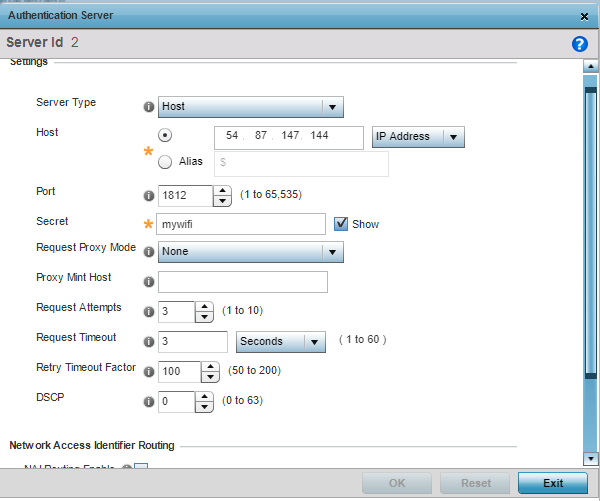
Configure a Secondary RADIUS Server with the following parameters:
- IP Address: 52.4.206.21
- Secret: mywifi
- Port: 1812
Configure RADIUS Accounting:

- Name: Enter name for Accounting method (ex. MyWiFi RADIUS Accounting)
- Type: select AAA Policy Edit
-
Backup RADIUS: check "Enable Backup RADIUS support"

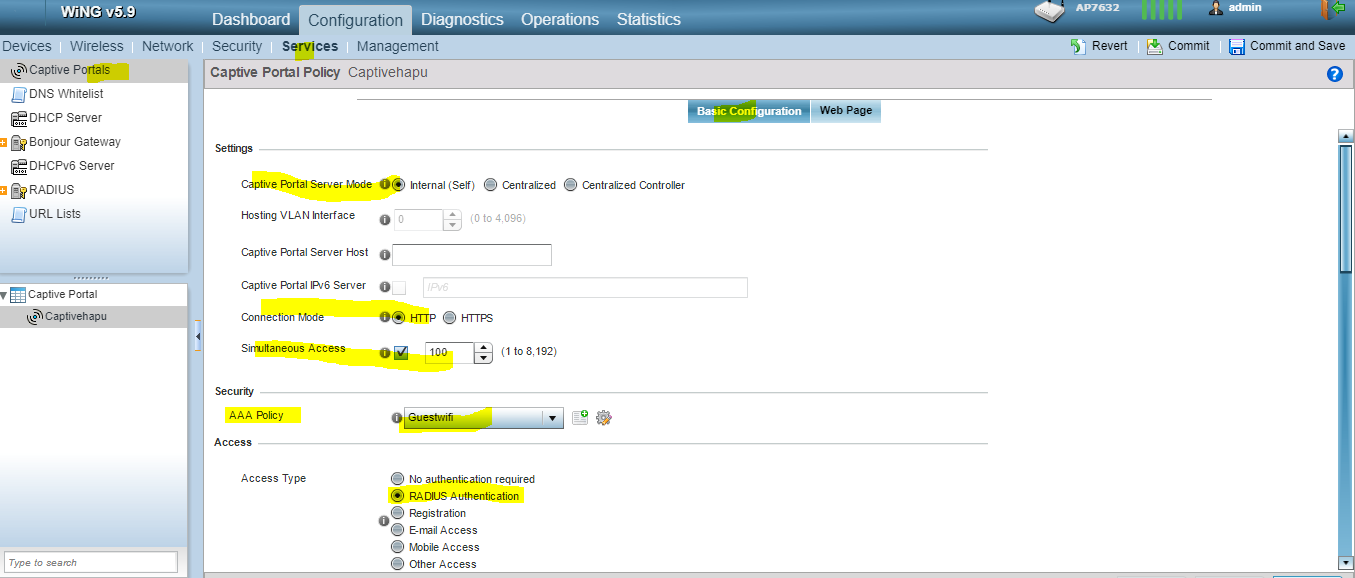
Create a new Captive Portal Profile
- Name: MyWiFi
- Captive Portal Server Mode: [Dependant on your deployment]
- Captive Portal Server Host: Enter your custom social portal URL. If you don't have one, use securewifilogin.com
- Connection Mode: HTTP or HTTPS
- Simultaneous Access: Enter as many clients as you think is necessary
- AAA Policy: Choose your previously-created policy
-
Access Type: Radius Authentication
Redirect URLs
- Web Page Source: Captive_Portal_Webpage_External
- Enter Domain: Enter your custom social portal URL. If you don't have one, use securewifilogin.com
User Session
- Session Timeout: leave unchecked
- Grace Period: leave unchecked
Authentication/Accounting Servers
- Authentication Server: select the Server entered as MyWiFi RADIUS Auth
- Enable MAC authentication bypass: unchecked
- Accounting Server: select the Server entered as MyWiFi RADIUS Accounting
- Send Interim-Update: enter every 5 minutes
- Wireless Client Isolation: unchecked
Walled Garden / Domain Whitelist Settings
The DNS whitelist is a list of domains that can be accessed before authentication -- you'll need to set this up to be able to use MyWiFi.
All the domains must be entered individually and in the following format:
Here is the complete list of domains that need to be whitelisted:
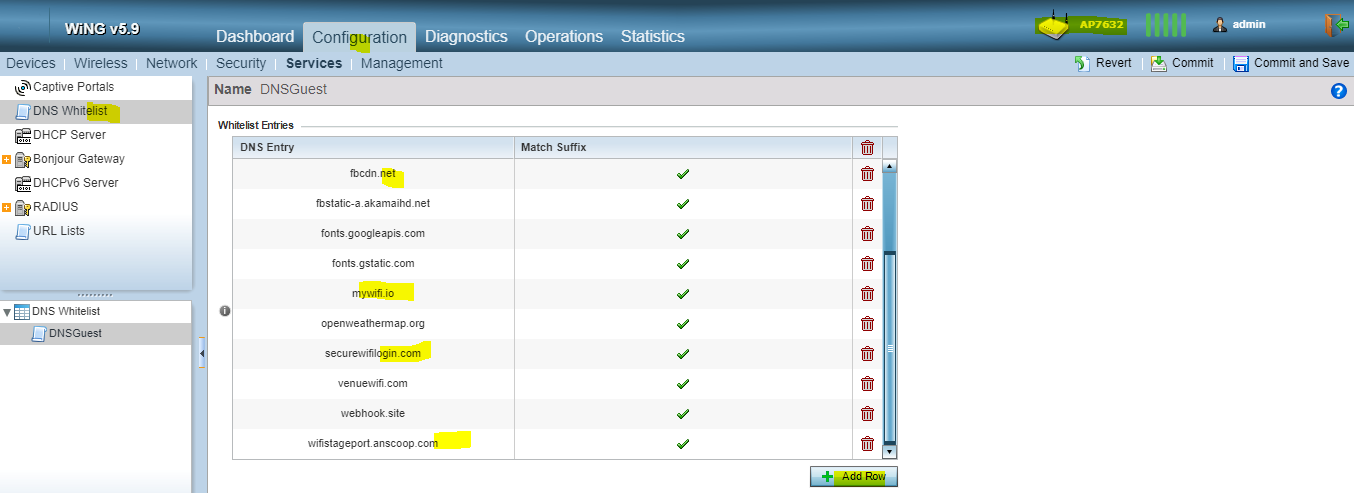
Add Into Your Allowed Hosts/Domains Prior to Authentication List
*.<Custom Social Portal Domain>
*.mywifi.io
*.securewifilogin.com
*.cloudfront.net
fonts.gstatic.com
fonts.googleapis.com
*.linkedin.com
*.amazonaws.com
*.licdn.com
*.twitter.com
*.facebook.com
*.fbcdn.net
*.doubleclick.net
*.fbsbx.com
*.twimg.com
*.instagram.com
*.facebook.net
*.stripe.com
*.paypal.com
*.paypalobjects.com
*.twilio.com
*.vk.com
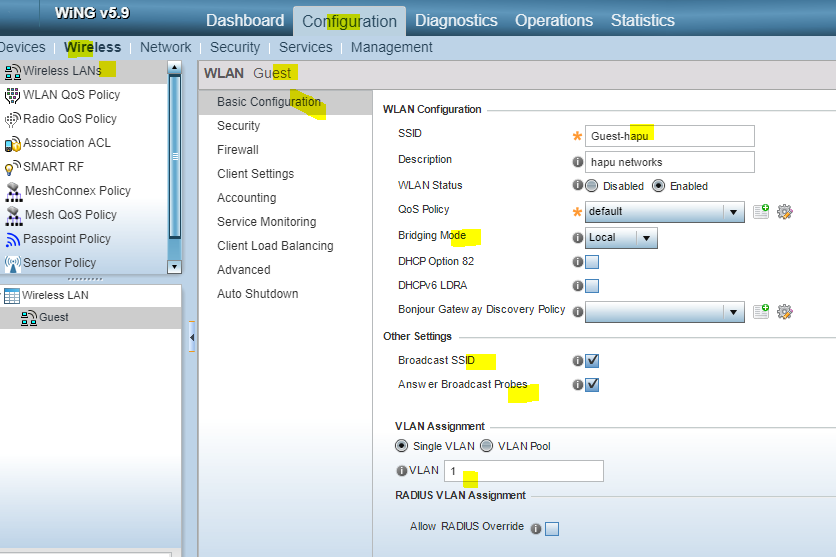
Wireless LAN Settings
- WLAN: Guest
- SSID: enter your desired SSID
- WLAN Status: Enabled
- VLAN: 1 (or your alternate selection)
- Bridging-Mode: local
- Encryption-Type: none
- Broadcast SSID: checked
- WLAN Captive Portal - Enforcement: Captive Portal Enable
-
WLAN Captive Portal - Captive Portal Policy: (select previously created Captive Portal Policy)